Ultimate Guide: How to Create a T-Shirt Tech Pack for Perfect Screen Printing & Custom T-Shirts
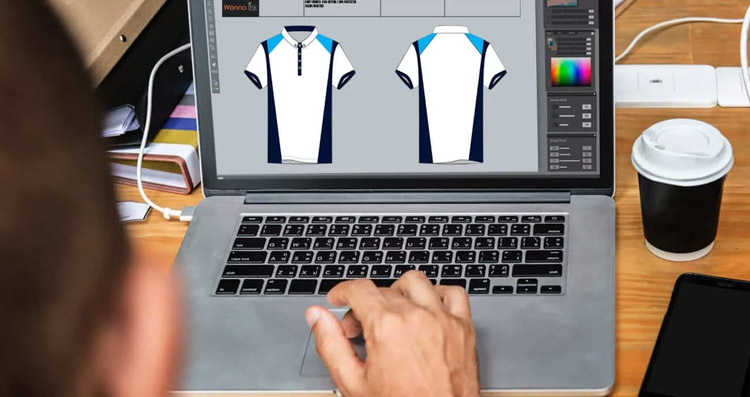
How to Create a T-shirt Tech Pack: A Step-by-Step Guide for Custom T-shirt Printing
If you're serious about producing high-quality custom t-shirts, a T-shirt Tech Pack is your blueprint for success. Whether you're a fashion entrepreneur, a budding designer, or someone looking to bring a unique t-shirt concept to life, understanding how to create a detailed tech pack can make or break your manufacturing process.
A tech pack, also known as a technical specification, spec pack, BOM (bill of materials), or garment worksheet, serves as a communication bridge between you and your manufacturer. This document ensures your custom t-shirt designs are accurately translated into the final product without errors or misinterpretations.
In this detailed guide, we'll walk you through the step-by-step process of creating a professional T-shirt Tech Pack, optimized with screen printing, DTG (Direct-to-Garment), and other printing techniques in mind.
Why Is a Tech Pack Important for Custom T-shirts?
A T-shirt Tech Pack is the ultimate tool for accurately reproducing your design. Here's why it's essential:
- Prevents miscommunication between designers and manufacturers.
- Minimizes production errors and unnecessary revisions.
- Ensures consistency in bulk orders.
- Speeds up production by giving manufacturers exact specifications.
- Helps with cost estimation and budgeting.
Creating a well-structured t-shirt specification sheet is crucial, especially if you order in bulk for screen printing or any other printing method.
Let's show you how you can create your Clothing Tech Pack.
1. Tech Pack Dimension and Layout
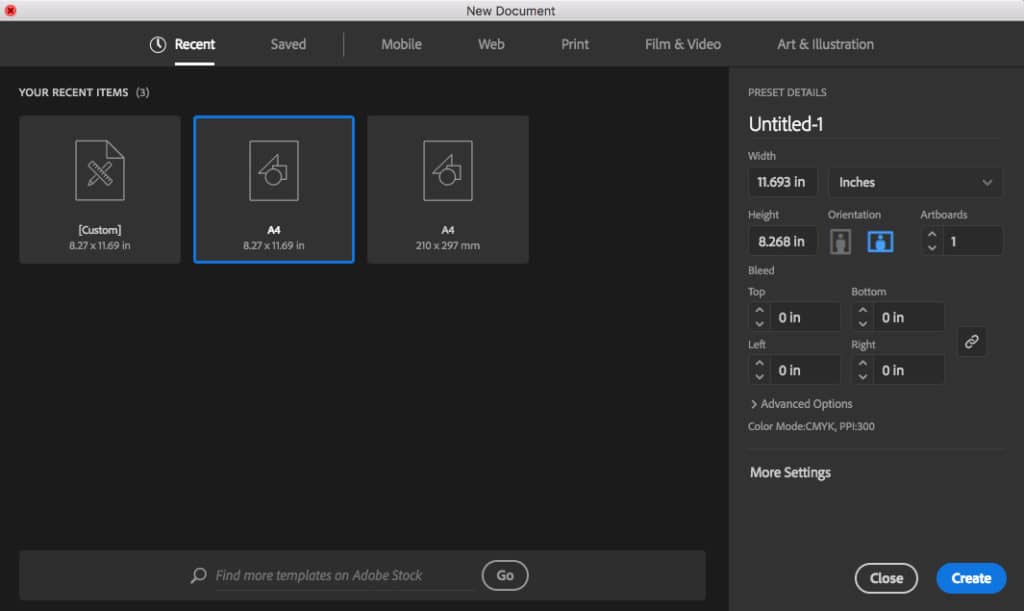
We recommend using Adobe Illustrator or similar design software to create a T-shirt Tech Pack. Follow these best practices:
- Set the document size to A4 horizontal (11.69×8.27 inches) for easy printing and PDF conversion.
- Work in CMYK color mode to match print specifications.
- Maintain 300 DPI resolution for clarity.
After you create a new document, we begin with a simple layout. It includes your official Brand logo and all relevant design information.
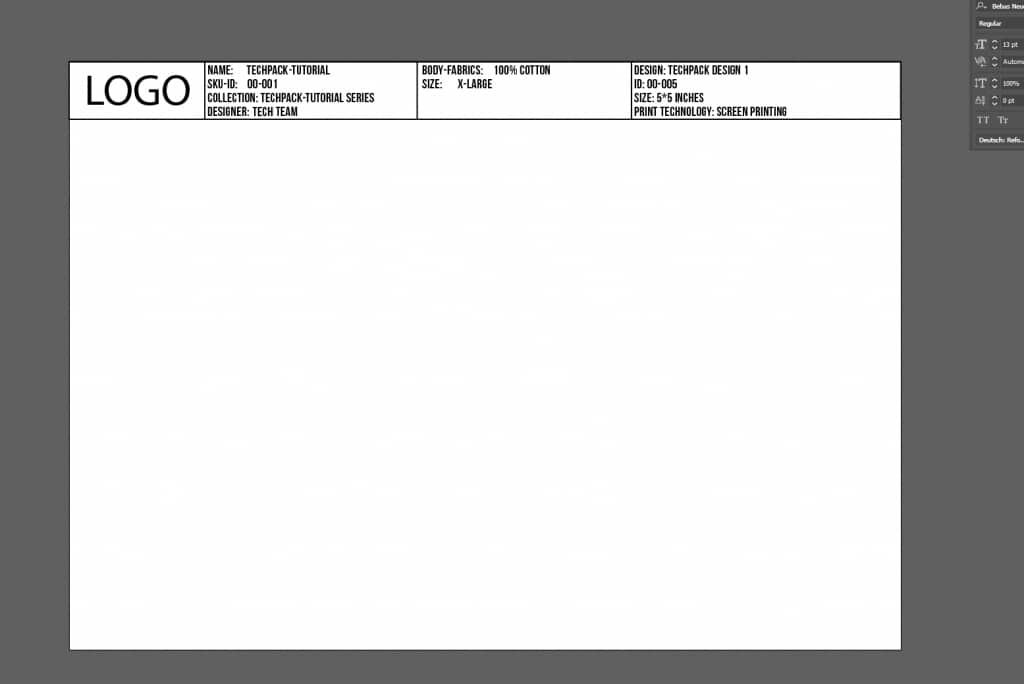
When you create a tech pack for your custom T-shirt designs, it's important to keep the legend simple and easy to understand. The legend helps anyone reading the tech pack quickly find and understand the main details of your design. While avoiding extra information is best, the legend must still include all the key details that your manufacturer, design team, or anyone else involved will need. A messy or confusing legend can lead to mistakes and delays, so make sure each part is clear and necessary.
Let's review what should be in your T shirt Tech Pack legend to keep everything organized and easy to follow. Here's a breakdown of each section:
🔹 Logo – The Official Brand Logo
Include your official brand logo in the tech pack. This makes your tech pack look professional and tells the manufacturer which brand it's for. Since your logo might go on the final product, putting it in the tech pack ensures everyone knows exactly how it should look and where it goes. If you have different logo versions, specify which one to use for this design.
🔹 Name – Labeling Your Tech Pack
Give each tech pack a clear name. This keeps you organized, especially when you have many designs. A good name also makes it easy for everyone (your team or your factory) to find the right file quickly—no more mix-ups!
🔹 SKU-ID – The Product Identification Code
Every item in your tech pack needs a unique SKU-ID (or just ID). This code helps you and your factory track the product during production. You'll also use this ID in your shop or website. A separate ID for each design avoids mix-ups, especially if you have many products.
🔹 Collection – Is This Design Part of a Collection?
Tell your manufacturer if this design belongs to a collection. If it's part of a set of designs (a collection), say so in the tech pack. This helps them understand how it fits into your overall plan. Collections have matching themes or styles, so it's good for your factory to know. If it's just a unique design (not part of a collection), also say that clearly. This prevents confusion. Using collections keeps your designs organized and shows your brand's style.
🔹 Designer – Who Is Responsible for the Design?
State who designed the item. If you have a design team or work with other designers, give them credit here. This is important when sharing designs or handing off projects. It ensures the designer is recognized and clarifies who to contact about the design.
🔹 Body-Fabrics – What Materials Are You Using?
Tell your manufacturer what your t-shirt is made of (the body fabric). Is it 100% cotton, a polyester mix, or something special like organic cotton or bamboo? This is very important! If you're making different things (like hoodies and t-shirts), make separate pages in the tech pack for each item's fabric. For simple t-shirts, you can put the fabric info in the main legend. For more complicated designs, list the fabrics clearly so everything is made correctly.
🔹 Size – What Are the Final Product Dimensions?
Specify the final size of the t-shirt. Are you making men's, women's, or unisex sizes? List the measurements for each size (chest, sleeves, length, etc.). If you have diff rent sizes for one design, detail them all. Correct sizing is key to getting the fit right.
🔹 Design – Artwork and Logos
This part details the print on your tee (logos, words, pictures). If you're using a logo or design, the file name in your t-shirt tech pack must be the same as he actual file name. So, if your logo file is "T-Shirt-Logo.ai," that's what it needs to be called in the ech pack. This is really important so nothing gets mixed up, especially when you're working with many designs.
🔹 ID – Identifying the Specific Design
Give each design its own unique ID. This helps you keep track of everything, especia ly if you use spreadsheets or design software. A unique ID makes it easy to find any design, artwork, or version of a design. This avoids confusion and makes things easier for everyone.
🔹 Size of Artwork – The Dimensions of th Graphic
Tell the printer exactly how big you want your design to be. For example, "Logo: 6 inches wide x 4 inches height" or "G aphic: Full front of t-shirt." Clear artwork sizes prevent the design from getti g stretched or printed in the wrong spot.
🔹 Print Technology – What rint Method Will Be Used?
The print technology section specifies which printing method should be used for your custom design. There are sev ral print methods to choose from, and the one you select will depend on the fabric type, design complexity, and budget. Common options include:
- Screen Printing: Ideal for large runs of designs with fewer colors.
- DTG (Direct to Garment): Best for complex designs or smaller batches.
- Dye Sublimation: Suitable for polyester fabrics and full-color prints.
- Heat Press: Good for custom transfers or small quantities.
- Vinyl Cutting: Common or bold designs or text-based artwork.
Selecting the correct print method will ensure that your design comes out as expected and that the T-shirt meets your quality standards. To avoid confusion, specify the chosen method in the tech pack.
2. Creating Your Design Sketches and Tracing the T-Shirt
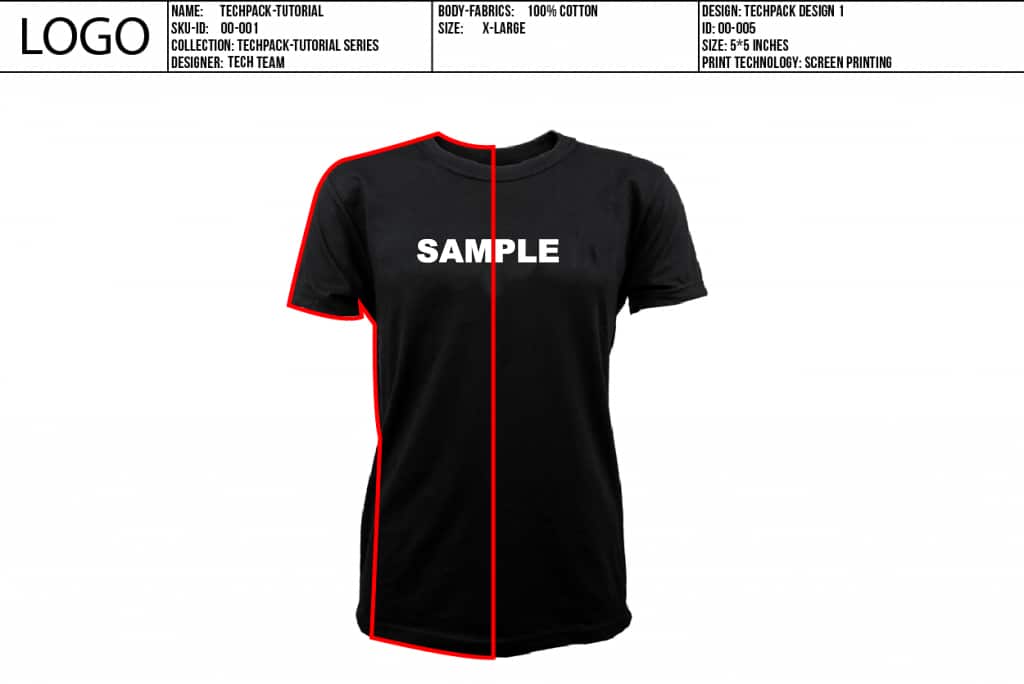
After setting up the Layout, it’s time to build your T-shirt Tech Pack’s core feature. Most of the time, fashion designers already have some drawings of their design, so they have to search it with Adobe Illustrator and trace it. For all of you who are not good illustrators, flat sketches, or new designers, there is no need to be discouraged. In our example, we used a prototype of our Sample T-shirt.
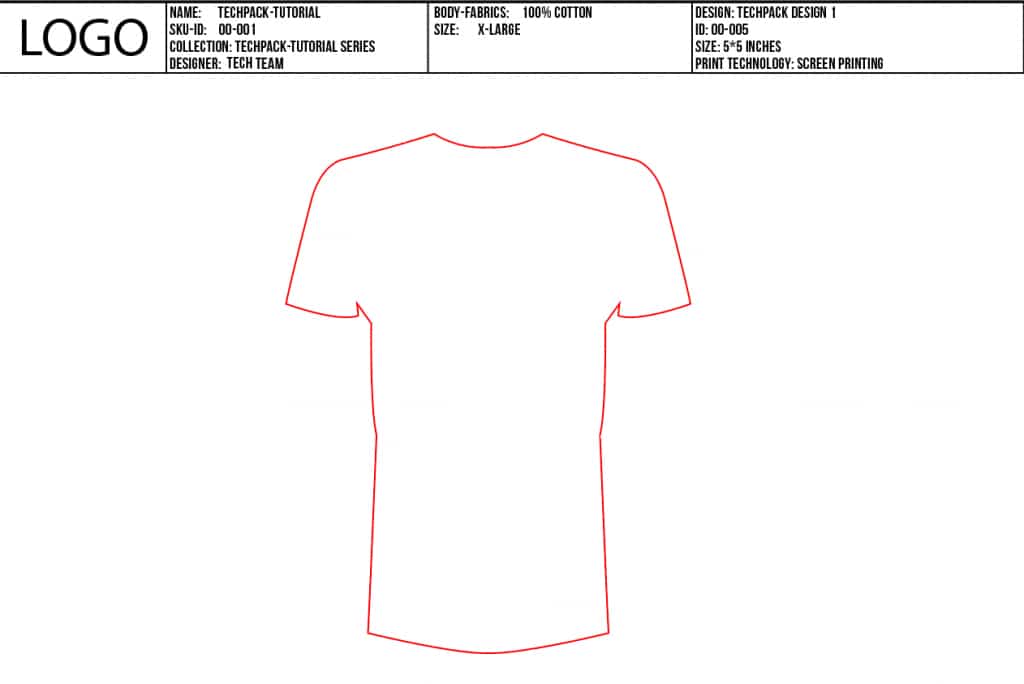
Use the Pen-Tool and trace half of the T-shirt. Take your time and make sure to have a nice shape. You only need to trace half of the T-shirt because we are going to duplicate and reflect the path to merge them in a selection/path.
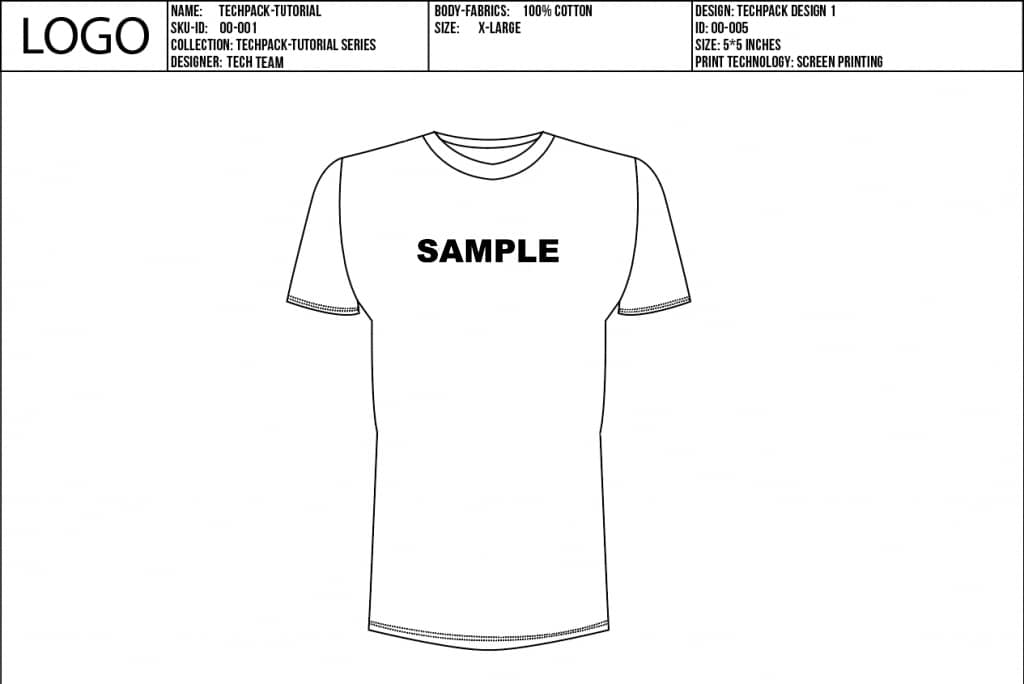
Now it’s time to add some design details like the seams, the joints, the neckline, and your artwork. We also recommend changing the color of the paths to black. (later, when you add a different length specification, you will need a red color)
3. Adding Measurements to the Tech Pack
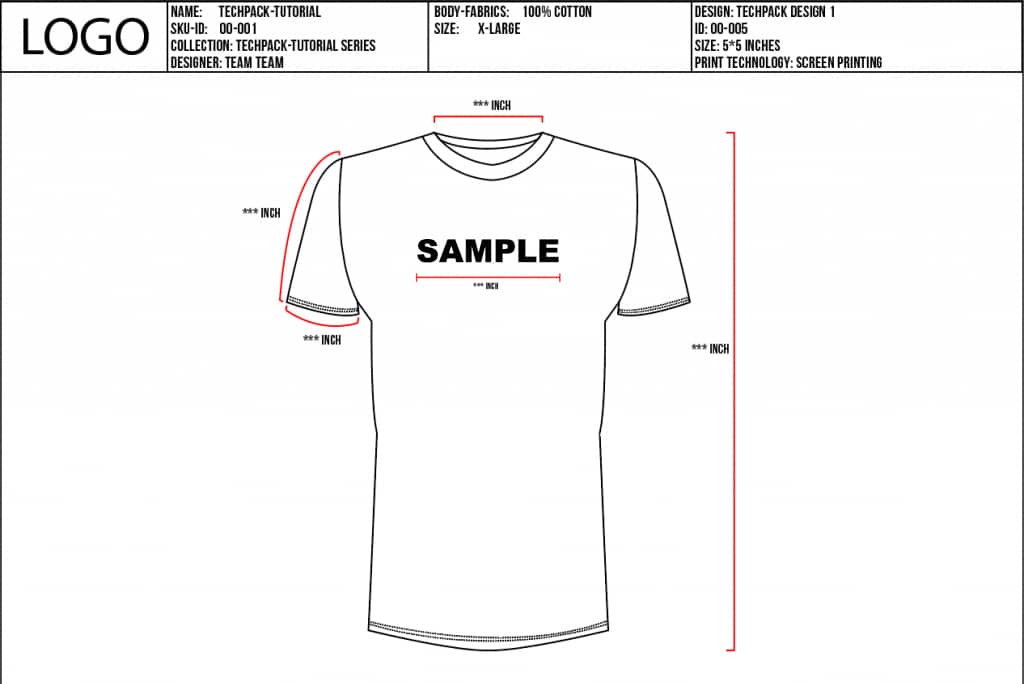
One of the most important aspects of your T shirt Tech Pack is the accurate measurement of your design. While there are countless T-shirts out there, it's the details in tailoring and measurements that make the difference between an average T-shirt and a great one. At Wannaink, we use a measuring tape and mannequin to create our unique signature fits. When you're building your Tech Pack, use the Pen Tool and highlight the measurement paths in a clear color—red works great for visibility.
It’s also important to make sure your team and manufacturers feel included in the process. They invest their time and effort, just like you do, to bring your vision to life.
Think of your t shirt Tech Pack as a detailed guide for manufacturers. The measurements you provide will be used to create the sample or final product, so getting them right is important.
Remember to use the correct unit of measurement! Most manufacturers work in inches, not centimeters, so stick to inches to keep things consistent and avoid confusion during production.
4. Finalizing Your Tech Pack: The Ultimate Checklist
Before you send your completed tech packs to manufacturers, review everything carefully. Make sure you've covered all the necessary details and that the pack is easy to understand.
Here's a checklist to guide you:
- Is your t-shirt tech pack clear and organized so that any manufacturer, anywhere, can easily understand it?
- Have you included an introductory page at the front of your t-shirt tech pack, with images of your designs to give a visual overview?
- Have you specified the quantities you want to produce and included a size breakdown for each item of clothing?
- Did you clearly list the fabric choices for each garment?
- Have you provided Pantone color examples for each fabric and detailed the materials you want to use for each piece?
- If your design includes printing or embellishments, have you included the correct examples and specifications for them?
- Did you include accurate seam-to-seam measurements for each item in your t-shirt tech pack?
- Have you provided clear specifications for care labels, woven labels, and hang tags?
If you can answer "YES" to all these questions, your t shirt tech pack is ready to be sent off to the manufacturer.
A T-shirt Tech Pack is an essential tool for ensuring smooth production, accurate printing, and high-quality results. Whether you're using screen printing, DTG, or heat transfer, having a clear spec pack prevents costly mistakes and speeds up the process.
At Wannaink, we specialize in creating factory-ready Tech Packs for t-shirts, hoodies, and other apparel. Our expert designers will help you craft the perfect spec sheet for your bulk orders.
💡 Need a professional Tech Pack? Contact us today and bring your custom t-shirt designs to life!


