Mastering Logo Embroidery on Apparel

Introduction: Boost Your Brand with Logo Embroidery Design
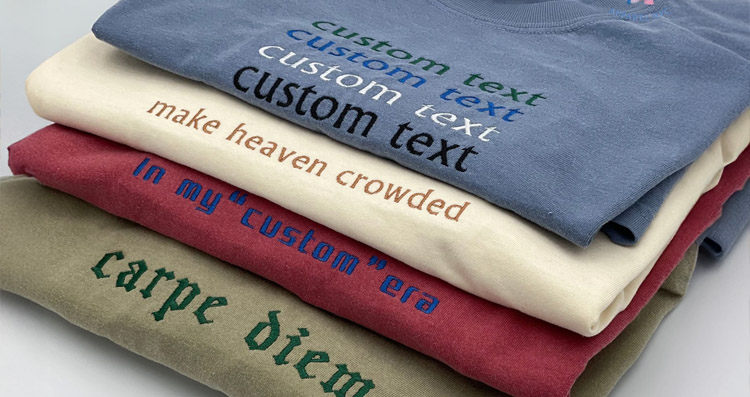
Have you ever wondered how you can boost your brand's visibility and professionalism with something as simple as your logo? Logo embroidery on apparel is one of the best ways to create a premium, high-end look for your brand. Whether you are designing custom embroidered t-shirts, polos, hoodies or even caps, mastering logo embroidery can significantly upgrade your brand identity, making your apparel look more polished and boosting its perceived quality.
However, embroidery is far more complicated than traditional printing methods. Factors like stitch density, fabric type, thread quality, and logo size all play critical roles in determining the final product's appearance and durability.
In this guide, we will cover essential logo embroidery design tips to help you create perfectly stitched logos for your custom apparel. Whether you are a business looking for custom logo embroidery or a designer exploring embroidery design tips, these guidelines will make sure your design stands out.
1. Choosing the Right Logo Size for Embroidery
The size of your embroidered logo is important for ensuring clarity, visibility and durability.
✔ Small Logos (2-4 inches): Ideal for chest embroidery on t-shirts and polos.
✔ Medium Logos (4-6 inches): Best for back or sleeve placement.
✔ Large Logos (6+ inches): Works well for jackets, hoodies, and sweatshirts.
💡 Pro Tip: Avoid overly small, intricate designs—fine details can get lost in embroidery stitches which can impact the quality of your embroidery logo design.
2. Best Logo Placement for Embroidered Apparel
Choosing the right logo placement ensures your design looks professional and enhances brand visibility.
✔ Left Chest: The most common placement for corporate and business branding.
✔ Center Chest: Works well for fashion brands and statement designs.
✔ Sleeve Embroidery: An excellent option for subtle branding on casual t-shirts.
✔ Back of the Neck: A stylish, modern placement often used in luxury streetwear.
💡 Pro Tip: Keep the placement consistent across all apparel items for a cohesive brand image.
3. Selecting the Right Thread Colors for Embroidery
Choosing the right thread colors enhances visibility and makes your embroidery stand out on apparel.
✔ High-Contrast Colors: Use bold colors (e.g., white thread on black fabric) for maximum visibility.
✔ Monochrome Designs: Keep things minimal with subtle, tone-on-tone embroidery.
✔ Metallic & Neon Threads: Great for fashion-forward designs and statement branding.
💡 Pro Tip: Stick to a maximum of 2-3 colors for a clean, professional look.
4. Stitch Density: Finding the Right Balance
Stitch density refers to how closely packed the embroidery stitches are. The right balance is essential for clear, long-lasting designs.
✔ High Stitch Density: Best for bold, thick logos (e.g., brand name in block letters).
✔ Low Stitch Density: Works well with a softer finish for delicate embroidery.
💡 Pro Tip: Overcrowding stitches can damage the fabric. Test the stitch density before full production to achieve the best results for your embroidered logo design.
5. Choosing the Best Fabric for Embroidered Apparel
Not all fabrics handle embroidery the same way. Selecting the right t-shirt material ensures cleaner and more durable stitching.
💡 Pro Tip: Stick to midweight cotton, fleece and pique fabrics for the best logo embroidery results. These fabrics hold embroidery stitches well without stretching or losing shape.
6. Simple vs. Detailed Logos: What Works Best?
✔ Best for Embroidery: Bold, simple logos with clean lines and minimal detailing.
✔ Worst for Embroidery: Small, detailed logos with intricate shading or gradients.
💡 Pro Tip: If your logo has fine details, consider simplifying the design or using larger embroidery sizes to improve visibility.
7. Common Mistakes to Avoid in Embroidery Design
🚫 Text That Is Too Small – Fonts smaller than 0.25 inches are likely to be unreadable in embroidery.
🚫 Too Many Colors – Limit your design to 2-3 colors for better clarity and cost-efficiency.
🚫 Using Thin Strokes – Thin lines may get lost or break up during stitching.
💡 Pro Tip: Always test print embroidery samples before full production to catch potential issues early and refine your embroidery design guidelines.
8. Budgeting for Custom Logo Embroidery
Embroidery pricing depends on stitch count, fabric type, and complexity. Here’s how to keep costs down:
✔ Limit Colors: More thread colors = higher costs. Stick to two-tone embroidery if possible.
✔ Simplify Your Logo: The fewer stitches required, the cheaper the production.
✔ Order in Bulk: Larger orders reduce the per-piece embroidery cost.
💡 Pro Tip: Focus on clean, simple embroidered logos for cost-effective branding.
FAQs About Logo Embroidery on Apparel
Midweight cotton is best—it holds embroidery stitches without stretching.
Yes, but avoid text smaller than 0.25 inches for better readability.
Stick to 2-3 colors for the best balance of visibility and cost-effectiveness.
Yes! Embroidery is more durable and lasts through multiple washes without fading.
Final Thoughts: How to Get the Best Logo Embroidery on Apparel
✔ Choose a high-quality fabric like cotton, fleece, or pique for the best embroidery results.
✔ Opt for bold, simple logos—avoid small text and thin strokes.
✔ Keep colors minimal to improve readability and reduce costs.
✔ Work with experienced embroidery professionals to ensure long-lasting, high-quality stitching.
Ready to bring your brand to life with flawless logo embroidery? Get in touch with our apparel consultants at +91 965-454-6400. They will help you with your design, select the right fabrics, and place your order.


